
AUTUMN ELF

This Tutorial was written for those that have a working knowledge of PSP.
Please do not copy it in anyway or claim its as your own.
Any resemblance to any other tut is purely coincidental.
This Tutorial was written on Sept. 26Th,2018
The tutorial was written and Created by Chiqui
For This Tutorial I used PSP X2
SUPPLIES
Close up of your choice
I am using the fantastic work of Verymany
You need a license to use. You can buy here
An Autumn landscape blend image of your choice:
I used one I found here
Font of choice font free Here
Sparkles (no animated) of your choice
any element of your choice
Filters:
- Mehdi/Waby Lab 1.1:
- L & K´s/ Andreas
- Flaming Pearl/Flood
- Alf´s Border FX/Border Film
- Transparency/Eliminate white
- MuRa´s Filter Meister/Copies
-Photo effexx Scanlines
- Nik Software Color Efex pro 3.0 Complete/Cross Balance/Tungsten To Daylight
Lets start:
Open an image 851 x 315 pixels Transparent
Foreground a light color of your tube
Background a dark color of your tube.
Make a Gradient with this settings:
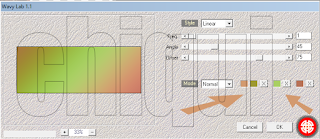
Apply Mehdi/Wavy lab 1.1 with this settings:
Duplicate
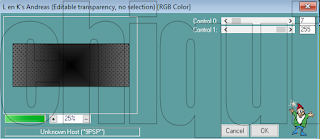
Apply effect L & K/L & K´s Andreas with this settings:
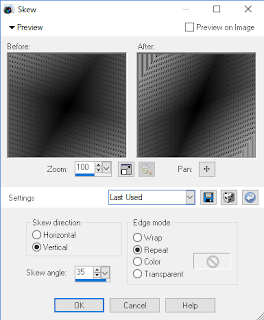
Apply Effects - Geometric Effects skew with this settings:
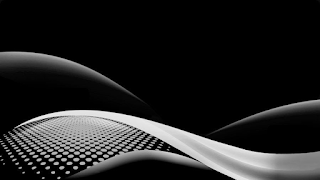
change blend mode to overlay or one to works better with your colors
Merge visible
Layer new raster layer
Fill with white
Apply this mask I found in Pinterest. here
If you know the author please write me.
Copy and paste your landscape blend image
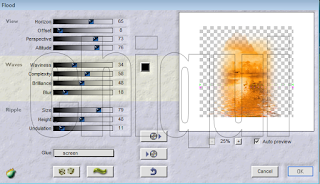
And apply Effect Flaming pear flood with this settings:
Layer new raster layer
Fill with white
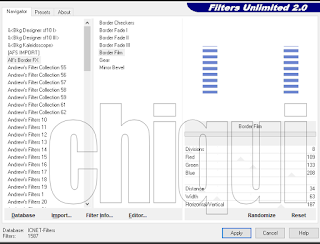
Apply effect Alf´s Border FX/Border Film with this settings:
(Note: this settings depend of colors you are using and you need to change until you get the color you want.)
Apply Effects Transparency - Eliminate white.
Effects - Image effects - offset with this settings:

Copy a paste sparkles of your choice position to the left side
Duplicate
Image mirror
ok. Now click in your last layer (the one we merge the bottom layer) and duplicate
Arrange - bring to top
Effects - geometric effects - perspective horizontal with this settings:
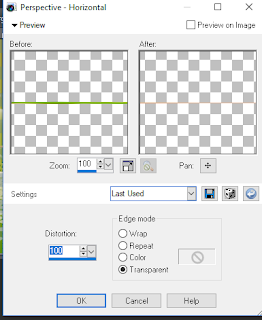
Image mirror
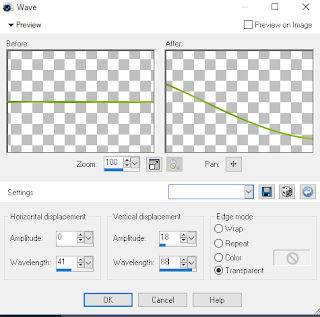
Apply the geometric effect again Then, apply effect distortion effects wave with this settings:
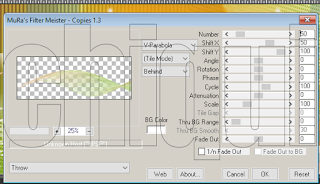
Effects Mura meister's copies with this settings:
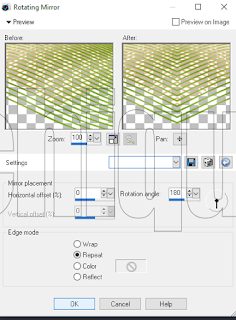
Effects - reflection effects - rotating mirror with this settings:
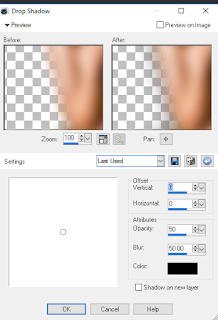
Apply Effects 3d Effects - Drop shadow with this settings:
copy a close up of your tube and position on the left side
Change the blend mode to overlay and drop the opacity to 90%
Copy and paste your tube
Duplicate
Blur Gaussian blur by 10
Change blend mode to overlay.
Image Add Border 1 px. Dark color
Image Add Border 1 - 5 px. White color
Image Add Border 1 px. dark color
Image Add Border 20 px. white color
with your magic wand select this border
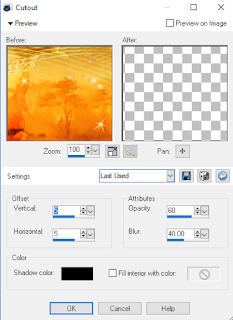
Effects 3d cutout with this settings:
No deselected
Photo effex scanlines with this settings:

Please do not copy it in anyway or claim its as your own.
Any resemblance to any other tut is purely coincidental.
This Tutorial was written on Sept. 26Th,2018
The tutorial was written and Created by Chiqui
For This Tutorial I used PSP X2
SUPPLIES
Close up of your choice
I am using the fantastic work of Verymany
You need a license to use. You can buy here
An Autumn landscape blend image of your choice:
I used one I found here
Font of choice font free Here
Sparkles (no animated) of your choice
any element of your choice
Filters:
- Mehdi/Waby Lab 1.1:
- L & K´s/ Andreas
- Flaming Pearl/Flood
- Alf´s Border FX/Border Film
- Transparency/Eliminate white
- MuRa´s Filter Meister/Copies
-Photo effexx Scanlines
- Nik Software Color Efex pro 3.0 Complete/Cross Balance/Tungsten To Daylight
Lets start:
Open an image 851 x 315 pixels Transparent
Foreground a light color of your tube
Background a dark color of your tube.
Make a Gradient with this settings:
Apply Mehdi/Wavy lab 1.1 with this settings:

Duplicate
Apply effect L & K/L & K´s Andreas with this settings:

Apply Effects - Geometric Effects skew with this settings:

change blend mode to overlay or one to works better with your colors
Merge visible
Layer new raster layer
Fill with white
Apply this mask I found in Pinterest. here
If you know the author please write me.

Copy and paste your landscape blend image
And apply Effect Flaming pear flood with this settings:

Layer new raster layer
Fill with white
Apply effect Alf´s Border FX/Border Film with this settings:
(Note: this settings depend of colors you are using and you need to change until you get the color you want.)

Apply Effects Transparency - Eliminate white.
Effects - Image effects - offset with this settings:

Copy a paste sparkles of your choice position to the left side
Duplicate
Image mirror
ok. Now click in your last layer (the one we merge the bottom layer) and duplicate
Arrange - bring to top
Effects - geometric effects - perspective horizontal with this settings:

Image mirror
Apply the geometric effect again Then, apply effect distortion effects wave with this settings:

Effects Mura meister's copies with this settings:

Effects - reflection effects - rotating mirror with this settings:

Apply Effects 3d Effects - Drop shadow with this settings:

copy a close up of your tube and position on the left side
Change the blend mode to overlay and drop the opacity to 90%
Copy and paste your tube
Duplicate
Blur Gaussian blur by 10
Change blend mode to overlay.
Image Add Border 1 px. Dark color
Image Add Border 1 - 5 px. White color
Image Add Border 1 px. dark color
Image Add Border 20 px. white color
with your magic wand select this border
Effects 3d cutout with this settings:

No deselected
Photo effex scanlines with this settings:

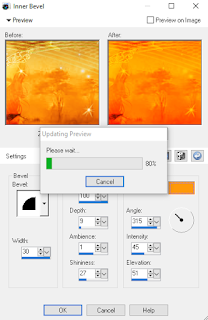
Effects 3d effects inner bevel with this settings:
Repeat Photoeffex scanlines
selections none
Image Add Border 1 px. Dark color
Resize to 851 x 315 since when we create borders
we lost the initial dimensions.
Add your copyright
Add your name.

Repeat Photoeffex scanlines
selections none
Image Add Border 1 px. Dark color
Resize to 851 x 315 since when we create borders
we lost the initial dimensions.
Add your copyright
Add your name.
AVATAR
Open a new image 200 x 200
Go to your tag close off the tube, copy merged, paste, resize to 60%, adjust
how you like,
Go to your tag close off the tube, copy merged, paste, resize to 60%, adjust
how you like,
Do
the same steps for border like the banner
Merge all crop
add copyright


