
BANNER USING PRESET SHAPES AND ANIMATION
This Tutorial was written for those that have a little knowledge of PSP.
Please do not copy it in anyway or claim its as your own.
Any resemblance to any other tut is purely coincidental.
This Tutorial was written on March 16th,2018
The tutorial was written and Created by Chiqui
Any resemblance to any other tut is purely coincidental.
This Tutorial was written on March 16th,2018
The tutorial was written and Created by Chiqui
For This Tutorial I used PSP X2
SUPPLIES:
Tube of your choice
Font of your choice
Filters:
L EN K LANDKSITEOFWONDERS/ L EN K'S ZITAH
DSB FLUX/ BRIGHT NOISE
ALIEN SKIN XENOFEX 2/ COSTELLATION
You can get this filterS HERE
Open a New layer 650 x 300 px Transparent
Select a color from our tube and fill the layer
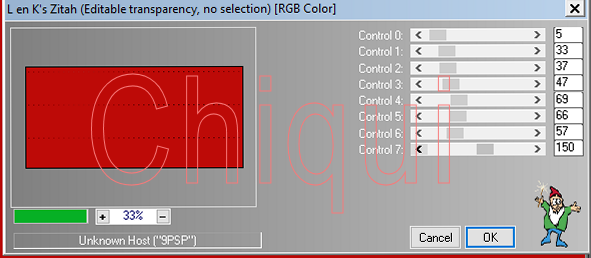
Now go to filter and apply the L en K filter:

Now we are going to apply the Effect-Edge effect-Enhace:

*
Open a New Layer
We are now to use the preset shape
Ypu can choose the shape you want

with this settings:

Draw the shape of your choice
(use 2 colors of your tube)
Go to adjust-Free rotate 45 to the left
Draw other shape of your choice (change the colors)
Copy and paste your tube resize and position to the left
Click in the first shape
then duplicate twice


Close the copies and click in the first one like this:


Apply the effect dsb-flux - gradient glow with this settings:


Deselected
Then close the eye of this layer and click in the copy 2 and open the eye on it
Select with ypur magic wand
Then close the eye of this layer and click in the copy 2 and open the eye on it
Select with ypur magic wand

Repeat the filter dbs but this time click twice in mix
Repeat the process with copy 3.
Now close again the copies and click on the first shape and go
to Effects Alien Skin xenofex 2 - constellation
and apply this settings:


Close the eye in the first shape, then open the second and apply the same settings, just
click in the random button. Close the eye in this one and repeat this step in the copy 3.
Now we are going to add a drop shadow to the other shape with
this settings:


Add the copy right and your name or the name of your choice.
Now we are ready for the animation:
For animation:
Close shape 2 and 3.. then go to edit copy special, copy merged. Open your animation shop and paste as a new image.
Back to psp close shape one and open shape 2. Go to Edit copy special... copy merged. Go to your animation shop and edit paste After current frame.
Back to psp close shape one and open shape 2. Go to Edit copy special... copy merged. Go to your animation shop and edit paste After current frame.
Back to psp close shape 2 and open shape 3. Go to edit copy special copy merged. Go to your animation shop and edit paste After current frame.
Now you have 3 frames on animation shop.
Save as a gift


3 comments:
me encanto tu lindo tutorial gracias
Pero que lindo te quedó amix
bello bello ese corazon
Post a Comment