
USING FILTER CAROLINE & SENSIBILITY AND XENOFEX 1.0
This Tutorial was written for those that have a working knowledge of PSP.
Please do not copy it in anyway or claim its as your own.
Any resemblance to any other tut is purely coincidental.
This Tutorial was written on April 4th,2018
The tutorial was written and Created by Chiqui
For This Tutorial I used PSP X2
Materials:
Filters CAROLINE & SENSIBILITY AND XENOFEX 1.0
Fat font of your choice
Let's get started
Open a raster white bakground layer 800x800 pixels
When we finish you can crop your raster.
Select a color for you background
Foreground null.
Using your text tool write a name or phrase of your choice.
Convert to raster layer
Duplicate
In your original layer
Go to selections - selections all - selections float - defloat
selection modify - expand by3
Fill with the same color
and apply Caroline and sensibility filter - CS-Dlines with this settings:
 Selections - none
Let's get started
Open a raster white bakground layer 800x800 pixels
When we finish you can crop your raster.
Select a color for you background
Foreground null.
Using your text tool write a name or phrase of your choice.
Convert to raster layer
Duplicate
In your original layer
Go to selections - selections all - selections float - defloat
selection modify - expand by3
Fill with the same color
and apply Caroline and sensibility filter - CS-Dlines with this settings:

Apply a Drop shadow with this setting:
1,1,60,2 grey color (NO BLACK)
Now go to your raster in the top (the original raster)
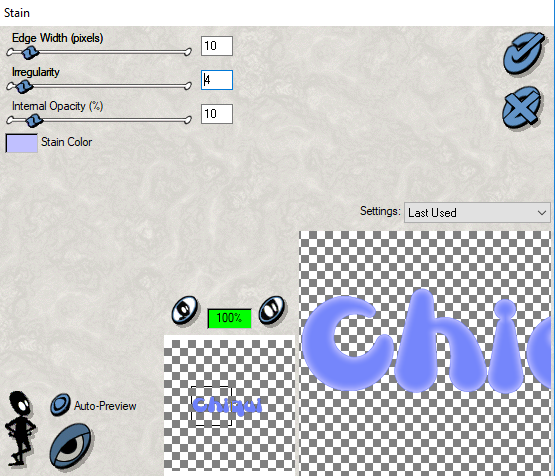
and apply Xenofex 1.0 - Stain with this settings:
Duplicate this layer
In the copy Selections all-float - defloat
Apply Xenofex 1.0 constellation with this settings:
 Drop the opacity to 70%

back to the original copy and apply
Adjust add noise - Gaussian noise with this settings:

Go to your raster in the botton before the white background
duplicate
in the original apply
Adjust - blur - Gaussian blur -10
Now ypu can add some embellisment to your name
elements of a scrap, etc.
crop your name
Close the white background
Layer merge - visible
Save as a png.
this is my result:


1 comment:
Lindo efecto amix
Post a Comment